Data Recovery
Deleted the wrong files? SeaweedFS Enterprise Data Recovery lets you find and restore deleted objects and files straight from the Admin UI, within a retention window you choose — no snapshot restore and no separate backup tool. Turn on a window, and recent deletes stay recoverable.
It complements (doesn’t replace) backups, replication, and Object Lock — it’s the fast, in-place fix for the most common cause of data loss: deletion.
When to use it
- An AI agent or script deletes the wrong files — recover the affected paths without rolling back unrelated work.
- A bad
rm, lifecycle rule, or sync removes the wrong prefix — restore one file, a batch, or a filtered set. - One user or key deleted across many paths — filter by owner and restore just that account’s deletions, without touching anyone else’s work.
- A malicious actor or compromised key sweeps data — if caught inside the window, inspect the blast radius and restore.
- An S3 delete marker hides an object — clear it in one click so the previous version returns.
- A specific object version was permanently deleted — recover it from retained bytes (bucket versioning alone can’t).
How to use it
1. Turn on a retention window on the master — how long deletes stay recoverable:
weed server -master.deletionRetention=72h
The default 0 disables it. The free 25 TB trial caps the window at 1 hour; a full license unlocks longer windows.
2. Recover from the Admin UI:
- Open the Admin UI → Recovery → Data Recovery.
- Click Scan, then filter by path prefix, glob, owner (user), or time range.
- Restore one file with the row action, or select many and Batch Restore.
- Pick where it lands and what happens if the target exists: keep, overwrite, or rename.
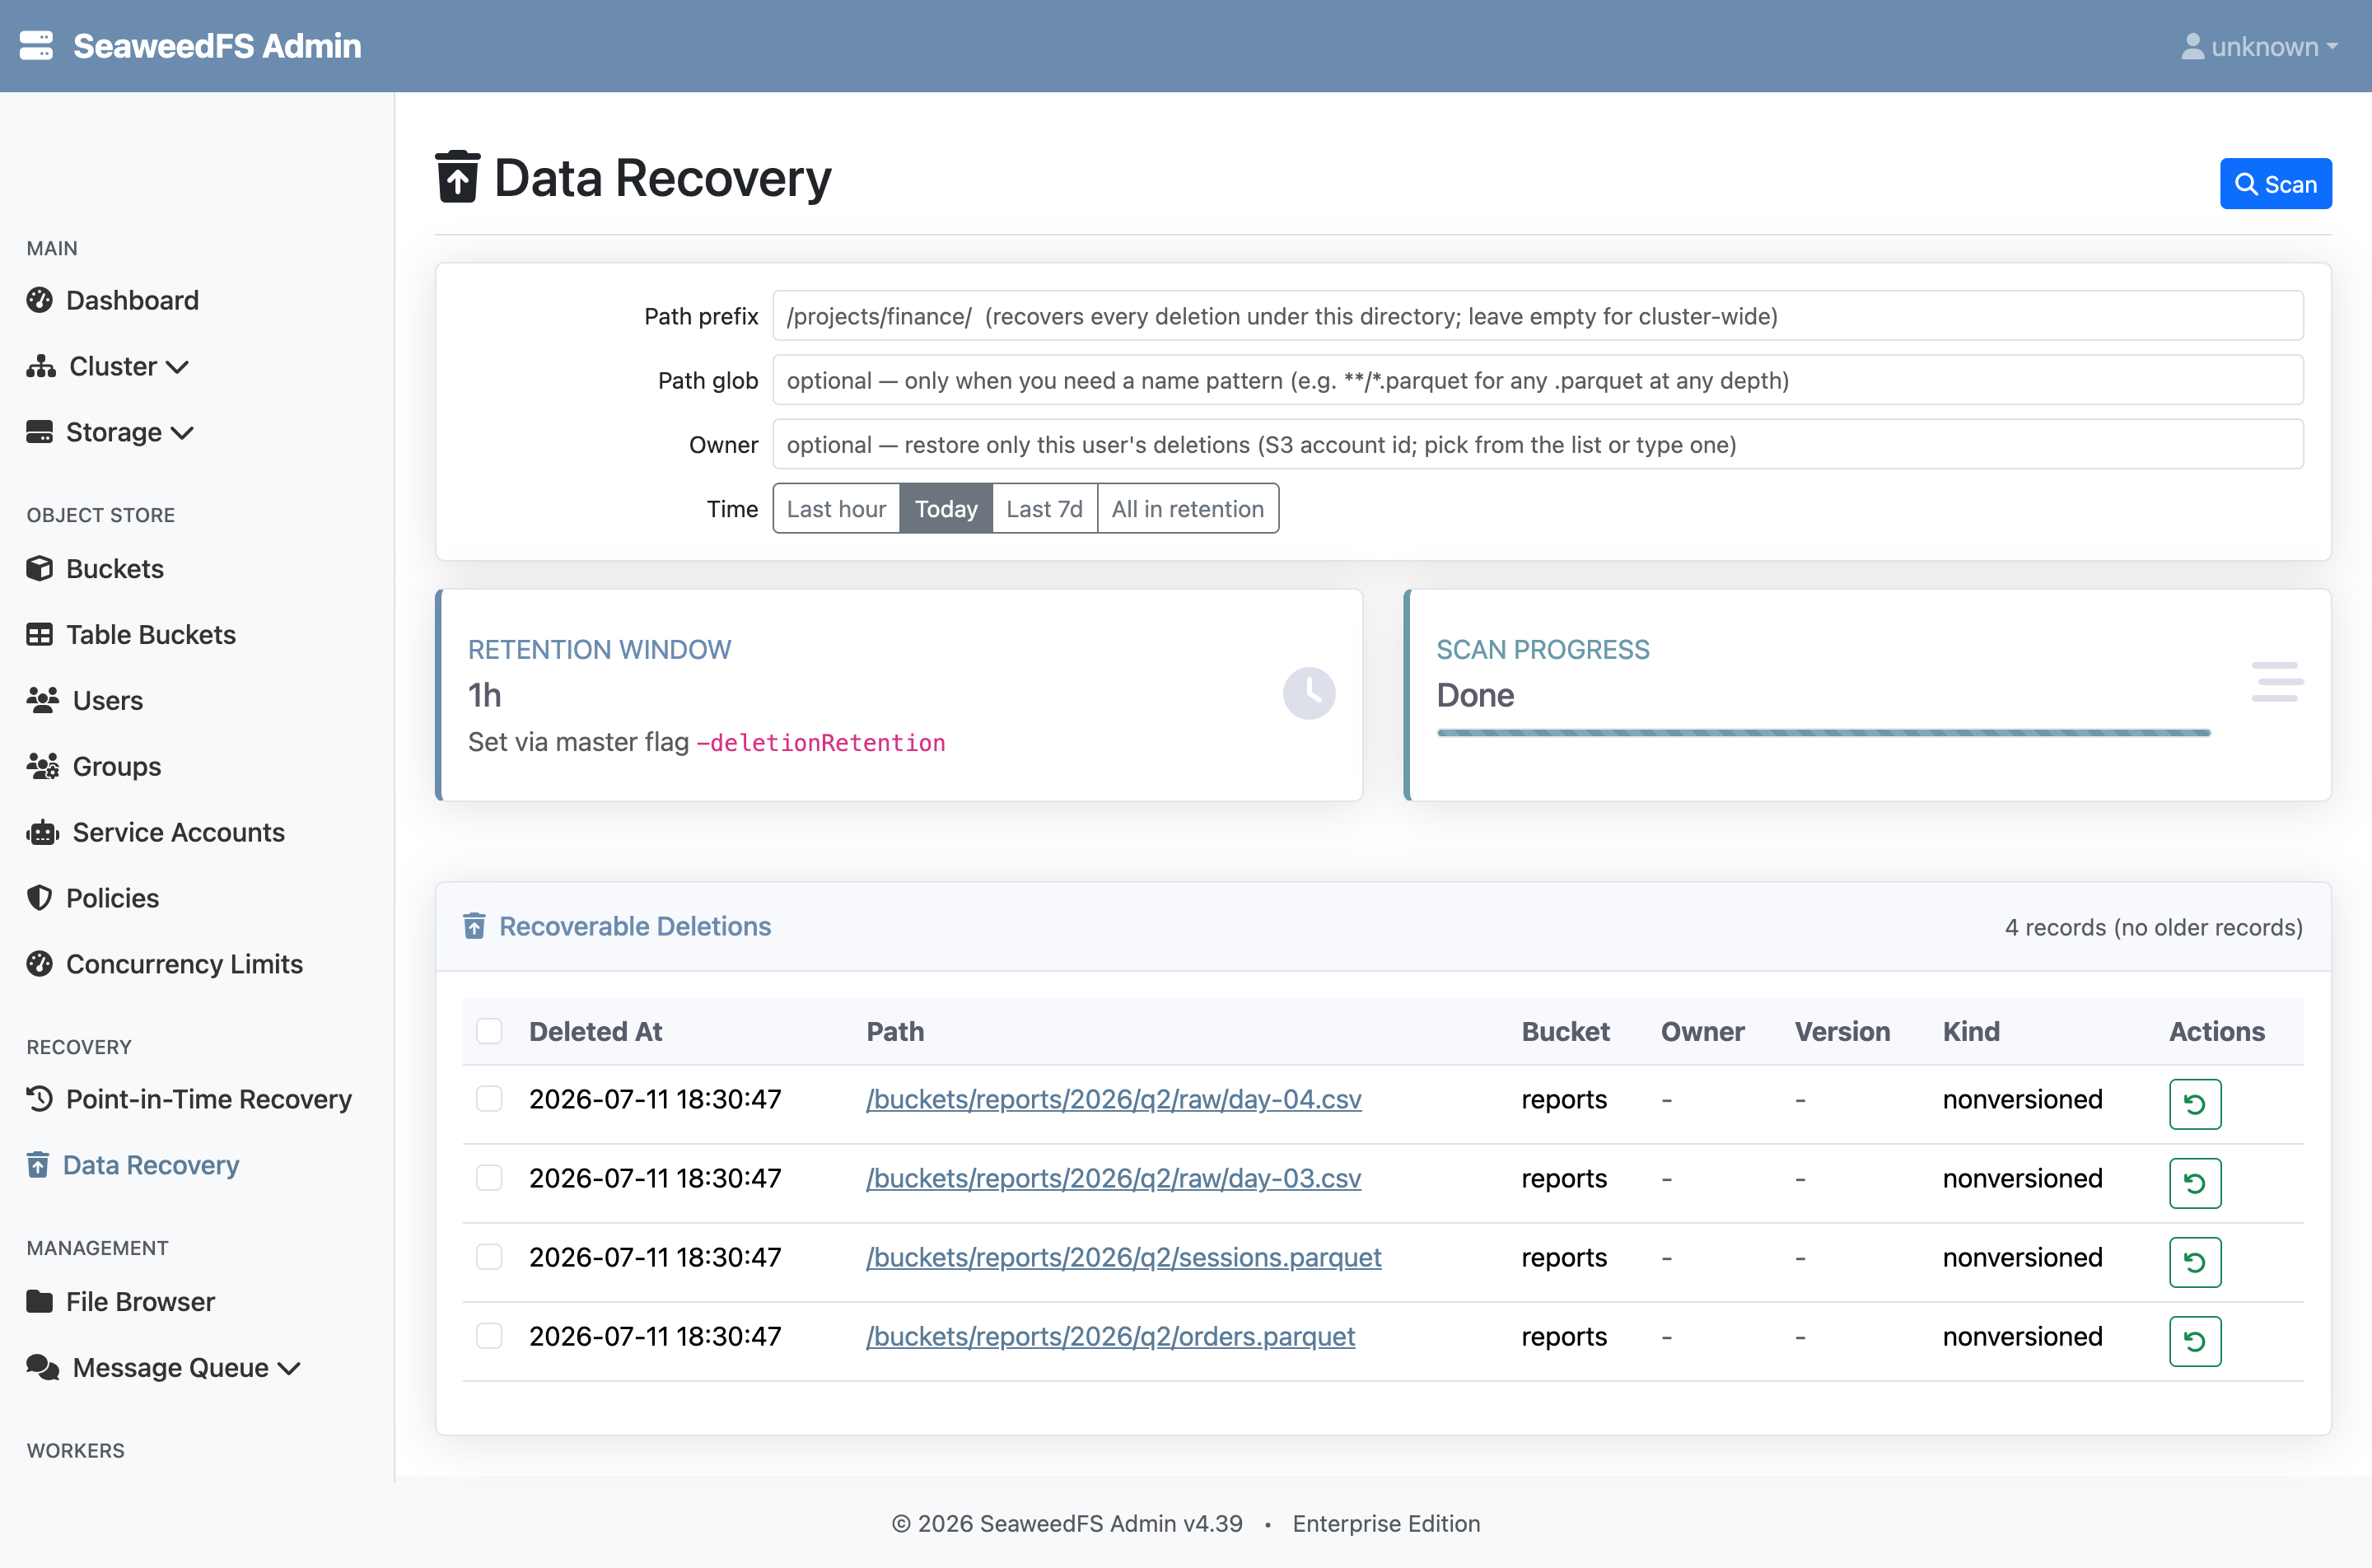
Restores reuse the data already retained on disk, so there’s nothing to roll back.
Benefits
- Minutes, not snapshots — recover directly from the Admin UI instead of restoring a backup.
- Scoped — restore only the affected files, by path or by the user who deleted them — not the whole cluster.
- S3-aware — clears delete markers and recovers permanently-deleted object versions.
- No new moving parts — uses retained data and the existing metadata log; nothing extra to deploy.
Want the internals — how retention, the metadata log, and restore work, plus the full HTTP API and limits? See the Data Recovery technical reference.